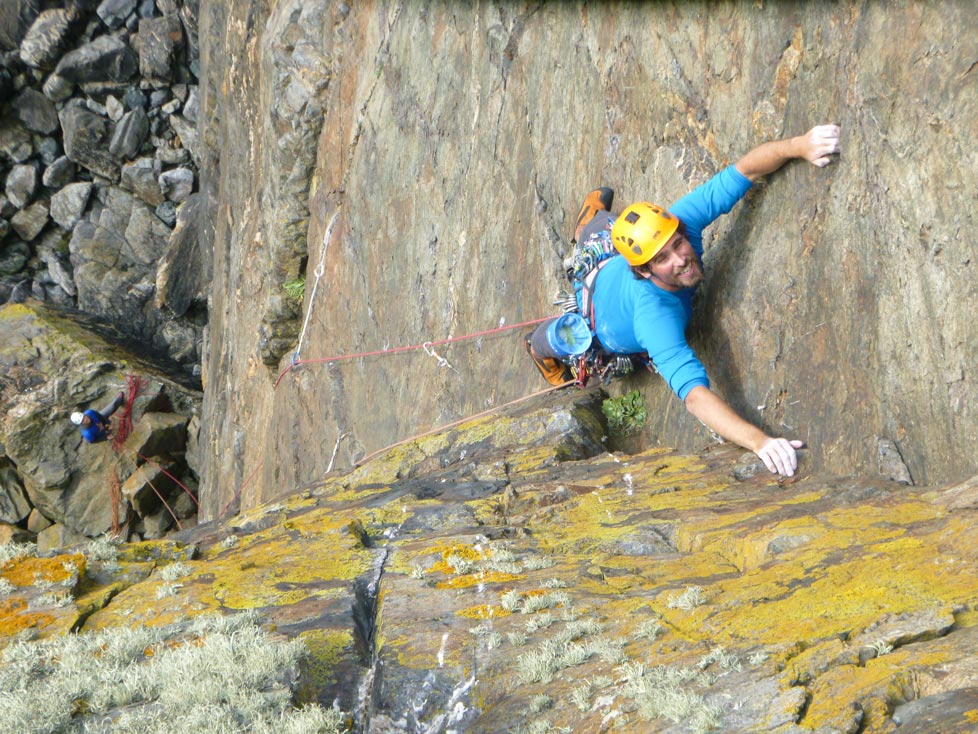
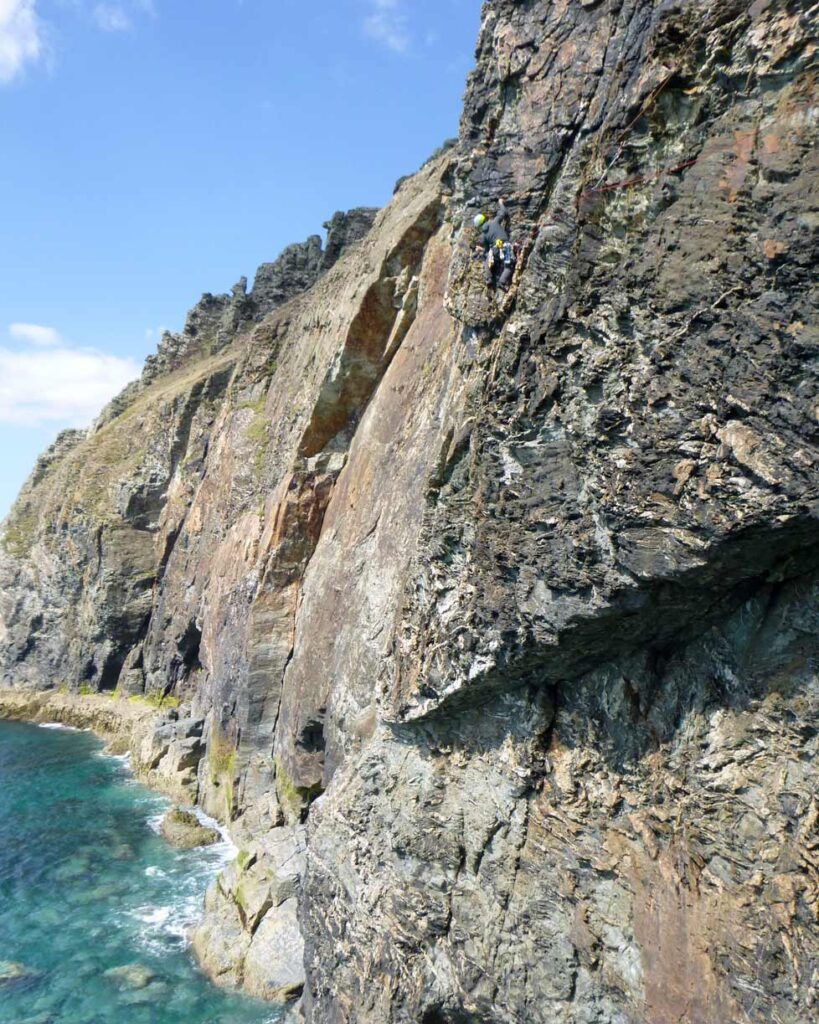
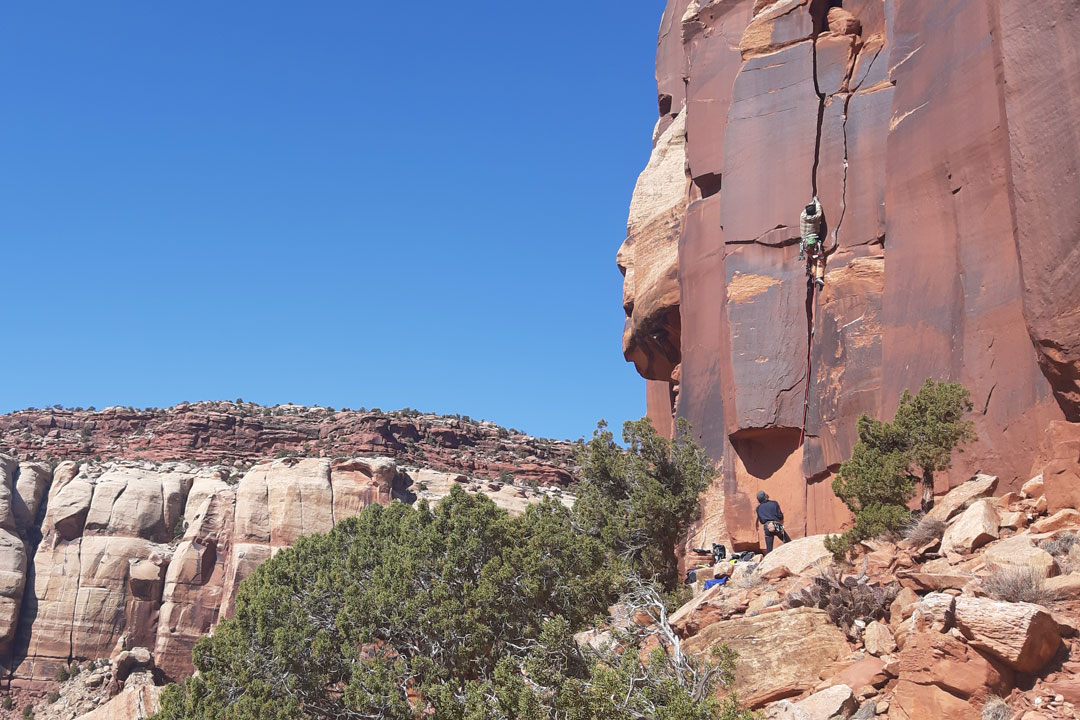
Rightly or wrongly, trad climbing is sometimes criticised for its unavoidable ‘faff’. It certainly takes time to climb a route from start to finish without a single piece of fixed gear, placing and removing every piece of protection, and building and dismantling every belay as you go. And for those of us who enjoy trad climbing, that is definitely all part of the fun.
Rest assured, trad climbing can afford a level of adventure unlike any other form of climbing we’ve mentioned so far (such as bouldering or sport climbing). However, the total lack of reliance on pre-installed protection on the rock means the trad climber has to carry enough gear to deal with pretty much any conceivable situation the crag may throw at them.
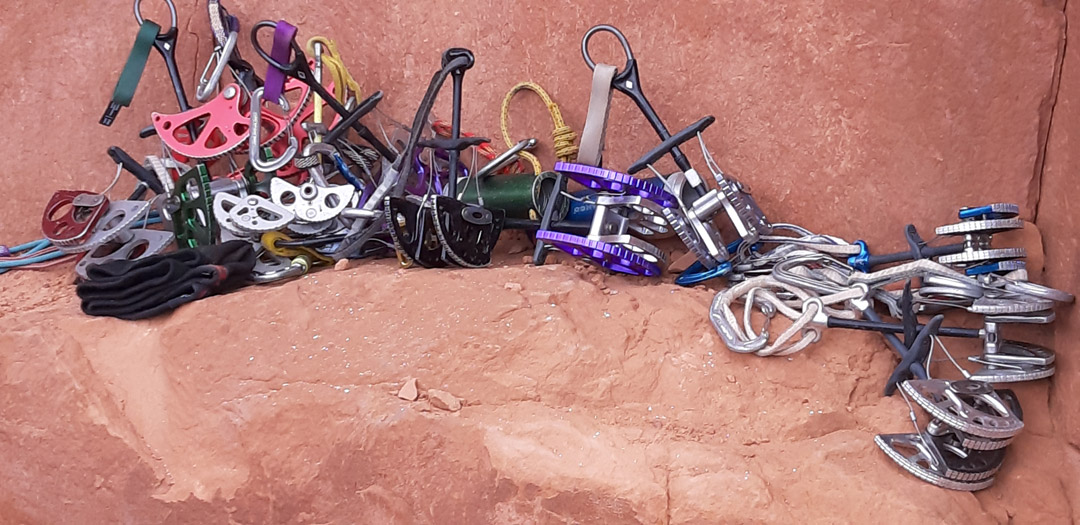
Thus, a trad climber’s equipment, their trad climbing rack, is necessarily comprised of a wide array of equipment. Most climbers aren’t in a position to rush out and buy everything needed to lead trad routes independently from day one.
This guide outlines the essential trad climbing gear you’ll need to second routes safely and start building your own rack. It’s based on real-world experience, with honest advice on what’s worth buying, and what can wait.
This post contains affiliate links. If you use these links to buy gear, we may earn a small commission at no extra cost to you. Thanks for your support.
Building Your Trad Rack One Piece at a Time
The good news is, you don’t need to buy your entire rack all at once. Most new trad climbers start by climbing with more experienced partners who already own a full rack and ropes. As long as you’re a safe and competent belayer, you’re already a valuable partner and many climbers are more than happy to take newer seconders out on the rock.
If you don’t know anyone to climb with yet, check out your local climbing club or visit the partners forums on the UKClimbing website. Don’t be afraid to ask the right questions to make sure your prospective partner is truly up to the task. If you’ve connected via a forum like UKC, reviewing each other’s logbooks is a great way to gauge experience before putting your life in their hands.
And of course, don’t underestimate the value of professional climbing instruction at various points in your climbing journey. Whether it’s to build confidence, learn rope systems, or practise placing gear, a session or two with an instructor can save you from developing bad habits or taking unnecessary risks.
But with climbing equipment in mind, this article will guide you through the trad climbing equipment you need, and when you need to get it. We’ll start with the bare minimum you need to second a lead climber who has their own rack.
By the end, we’ll have covered what you need to be a fully independent trad climber, capable of accessing any trad climb in non-winter conditions. Whether it’s an inaccessible sea cliff, or a remote mountain crag, you’ll be ready.
Being a Competent Second
There’s a minimum amount of gear you’ll need before you can realistically start reaching out to other climbers and arranging climbing meets. That means having enough personal climbing equipment to be considered a competent second.
A competent second has solid belay skills and is confident following a leader up a trad route, removing the gear they’ve placed along the way. You’re not expected to lead, but you are expected to be safe, attentive, and capable of handling basic ropework and gear removal.
It’s entirely reasonable to meet up with a climber who already owns a trad rack and ropes, and climb using their gear. In fact, that’s how most of us get started — and it’s a huge help, as it means you can begin trad climbing without having to invest in a full rack straight away.
However, you shouldn’t expect other climbers to lend you personal gear like climbing shoes, a harness, or a helmet. These are essential items you’ll need to bring yourself and we’ll cover them next.
Essential Personal Gear Checklist
The good news is that unless you’re brand new to climbing, you probably already own much of the gear you need. To start trad climbing as a competent second, here’s the minimum personal climbing equipment you should aim to have:
- Climbing shoes
- Harness
- Helmet
- Belay device and carabiner
- Chalk bag
- A few carabiners and slings
- Nut key
- Prusik loop
If you already have this essential climbing gear from indoor climbing, sport, or scrambling, you’re well on your way. You may want to skip ahead to building your lead trad rack.
Climbing Shoes for Trad Climbing
As with all forms of climbing, the choice of shoes is exhaustive. Broadly speaking it boils down to two parameters: comfort and performance. you’re spending long days at the crag on moderate or mid-grade routes (relative to your ability), comfort is key. There’s nothing worse than suffering a long, easy trad route in your tightest, most aggressively downturned shoes.
That said, if you’re pushing your limits on short, hard, single-pitch trad climbs — a bold headpoint, for example — then a performance shoe still has its place.
But if you’re new to trad climbing, I’d strongly recommend prioritising comfort over precision. A well-fitting, flat-lasted shoe you can wear all day will serve you far better in the long run than anything that makes your feet scream on belay ledges.
If you’ve already spent a long-time indoor climbing, bouldering or sport climbing, it’s likely you will already own a pair of more aggressive shoes. You may want to consider acquiring a more comfortable shoe that you can wear for long multi-pitch routes without suffering too much.
I’ve tried a lot of climbing shoes over the years, but the Tenaya Tarifa hits the sweet spot between comfort and performance. They’re precise enough for technical trad routes, yet comfy enough for long days on the rock.
Bonus points — they’re completely vegan, which is an important factor for me. In fact, I like them so much, I own three pairs.

Choosing a Trad Climbing Harness
When it comes to choosing a trad climbing harness, I’ve got a clear favourite: the DMM Renegade. Designed with traditional climbing in mind, it’s lightweight, minimalist, and comfortable enough to hang around in — without the extra bulk you often find in sport climbing harnesses where long hang sessions are the norm.
But what really sets it apart is the seven gear loops. As far as I’m aware, no other trad climbing harness offers that many. Maybe I’m biased from years of using one, but going back to a five-loop harness now would be a real struggle.
Here’s how I use the loops: the first two on each side take my main trad rack, while the third loop on each side is perfect for extras — slings, spare carabiners, and prusik loops. The central rear loop holds my belay device and a large HMS carabiner for anchor building.

Belay Devices and Carabiners for Trad
You will, of course, need to be able to belay your partner to be able to trad climb. A plethora of belay devices exist today, and many have often unusual methods to provide extra features, such as assisted braking.
Certainly in the UK, the traditional tube-type belay device still dominates. Its widely understood method of operation, ease of adapting to abseiling, and importantly, the ability to belay two ropes simultaneously, mean that no other kind of device looks to be replacing the tube-style belay device any time soon.
Two of the most widely used options are:
- DMM Mantis
- Petzl Verso
Both are lightweight, dependable, and widely compatible with double ropes.


Don’t forget, you’ll also need a suitable carabiner that works well with your chosen belay device. A medium size locking carabiner is what you’re looking for. Avoid carabiners that are too small (which can jam or interfere with the harness) or too large (which reduce friction and make the device less effective).
Some manufacturers offer belay device + carabiner combos, designed to work together seamlessly. Otherwise, the DMM Rhino is a widely respected choice.
Being the most critical connection in your safety system, there’s no harm in going above-and-beyond a locking carabiner to an even more secure locking mechanism, like some kind of twist lock mechanism which can require two or three coordinated movements to open. They’re easy to use and bombproof choices to make sure your belay carabiner doesn’t come undone at the wrong moment.

Helmets for Trad Climbing
Rockfall, dropped gear, careless climbers above you — and of course, the potential for head impact during a fall. These hazards exist across all disciplines, but in trad climbing — with its more adventurous terrain — they’re arguably more common.
The bottom line? I strongly recommend wearing a helmet for trad climbing. As you gain experience, you’ll make your own judgment calls about when to wear one, but if you’re just starting out, don’t leave it behind. Get one, and wear it — every time.
Look for helmets that meet the relevant safety standards: EN 12492 (UIAA Standard 106) for climbing and mountaineering. Always buy from reputable climbing brands, and check that your gear is certified for its intended use.
Helmets vary in weight, fit, ventilation, and comfort — and finding the one may take some trial and error. Below, I’ve highlighted three of the best climbing helmets currently available for trad, based on real-world use and what I see most often at the crag.
One final note: make sure your helmet includes clips for a head torch. Getting benighted on a route is part of the trad rite of passage — and having a torch you can attach in seconds can make all the difference.
1. PETZL Boreo — My Main Recommendation
If I had to recommend one helmet for all-round trad climbing, this would be it. PETZL gear is just built right — everything I’ve used from them, from helmets to headtorches to harnesses, has been rock solid. The Boreo is no exception: it’s tough, protective, and fits well right out of the box.


2. PETZL Borea — Female-Specific Fit
Essentially the same quality as the Boreo, but tailored for smaller heads and ponytail compatibility, which can really improve comfort. If you’re someone who struggles with generic unisex helmets, this one’s definitely worth a look. PETZL nailed it again here.
3. CAMP Storm — Top Lightweight Pick
CAMP might be considered a budget brand, but they punch way above their price point. I’ve used a lot of their gear over the years — including helmets — and always found them to be reliable, well-made, and seriously good value. The Storm is one of the lightest helmets around, making it ideal for long walk-ins or big days on the hill.

Chalk Bags and Chalk
As with all forms of climbing, chalk use is universal. If you don’t already own one, chalk bags are inexpensive and simple to use. A small cylindrical bag clipped to your harness — or better yet, worn around your waist on a belt or accessory cord — is ideal.
You can go with anything from a plain, no-nonsense chalk bag to a novelty fluffy animal. Since it’s not a life-critical item, the choice is entirely yours.
Surprisingly, not all chalk is created equal. Different brands use slightly different compositions, which can affect texture, moisture absorption, and overall feel. All are usable, but over time you’ll likely find a preferred brand that suits your skin and climbing style.
At this point, you now have the minimum personal gear needed to get out climbing with a well-equipped partner. They may still need to lend you a few bits depending on the route — especially for multi-pitch climbs, abseil access, or specific objectives — but you’re off to a solid start.
Bonus Gear for Seconding Trad Climbs
Before you start building a full trad rack and leading routes, it’s worth picking up a few extra essentials that will make you a better, more self-sufficient second — and avoid having to borrow things every time you climb.
First up: a few extra screwgate locking carabiners. In addition to your belay ‘biner, having two or three spares is invaluable. They’ll serve endless uses — from attaching to trad anchors and building belays, to solving unexpected problems that could otherwise become a real headache.


One of these carabiners should carry your prusik loop. This vital tool is simply a short length of accessory cord (typically 6mm), tied into a loop with a double fisherman’s knot. It’s essential for backing up abseils and has numerous uses in self-rescue situations. Personally, I wouldn’t head out on a multi-pitch climb or anything involving abseil access without one on my harness.

Slings
At this point, having one or two slings in your arsenal is also a good idea. Their primary use will be a use as a lanyard attached to your harness by ‘lark’s foot’. This enables you to rapidly connect to anchor points and safeguard yourself when, for example, setting yourself up for an abseil.
120cm Dyneema slings are what you’re after for this purpose.
Nut Key
As well as providing coffee, snacks, and foot rubs for your climbing partner (OK, maybe not), you can seriously impress them by bringing your own nut key.
While one nut tool can technically be shared between a climbing pair, it’s far more efficient if each person has their own. We’ve all been out climbing with one nut tool, only to find that you’ve just led a pitch and YOU have the nut key. And you just know that number 7 wire is not going to come out without a fight…
Stuck gear can spoil a pitch and waste time if it has to be retrieved later. A nut key avoids all that hassle.


Seconding a lead climber and cleaning the gear is invaluable experience for eventually placing you own gear and leading routes. The more time you have removing other climbers’ gear and analysing the placements they have used, the easier you will find it to learn to place bomber gear of your own. It’s inevitable that a fair amount of the pieces you remove will need a bit of encouragement with a nut tool.
Building Your Lead Climbing Rack
Now things really start to get exciting. You’ve been seconding for a while, cleaning gear, and learning the ropes — literally. You’ve watched closely as your partners placed protection, you’ve studied how to build bombproof trad anchors, and you’ve probably had a few days out with a professional climbing instructor to build your skills further.
Bit by bit, you’re becoming ready for the next step: leading your own trad climbs.
Chances are you’ve already done some leading using someone else’s rack — either with a friend or under instruction. Now you’re psyched to start putting together your own set of trad climbing gear and chasing adventures on your own terms.
There’s no need to rush out and buy an entire rack. In fact, it makes more sense to build it gradually — picking up a few key pieces to use alongside your partner’s gear. Before long, you’ll have enough to lead shorter routes, and eventually a full rack for longer or more gear-intensive lines.
Let’s walk through exactly what you’ll need to build your trad rack from the ground up.
Nuts (Wires)
The bread and butter of any climbing rack are nuts, or wires (I’ll hereafter refer to them only as nuts). These tapered alloy chocks are designed to nestle in constrictions in cracks in the rock, and when placed correctly will remain in place until removed by the seconding climber.
Individual nuts can be purchased, but you’ll need to start off with a set. All manufactures will give their nuts a number, typically from 1 to 10 (although numbers below one, and fractions do exist!). A complete set of wires won’t set you back much, and on short to medium-length routes a single set of wires should allow you to adequately protect a route without the need for additional gear.

Why do I mention a single set? Well, as you climb longer, more challenging routes, you may well decide you need more nuts. Whether you need a whole additional set is up to you. You may just want to buy a few single nuts of sizes you need.
For example, I have only singles of the largest nuts i.e., 8-10. I have doubles in the 3-7 range, and triples of sizes 1 and 2.

You may want to consider buying a comprehensive set of protection. For example, DMM offer some ‘starter sets’, allowing some savings to be made by buying in bulk. These can include a full set of nuts, as well as hexes, and even offset nuts (both of which we discuss below).


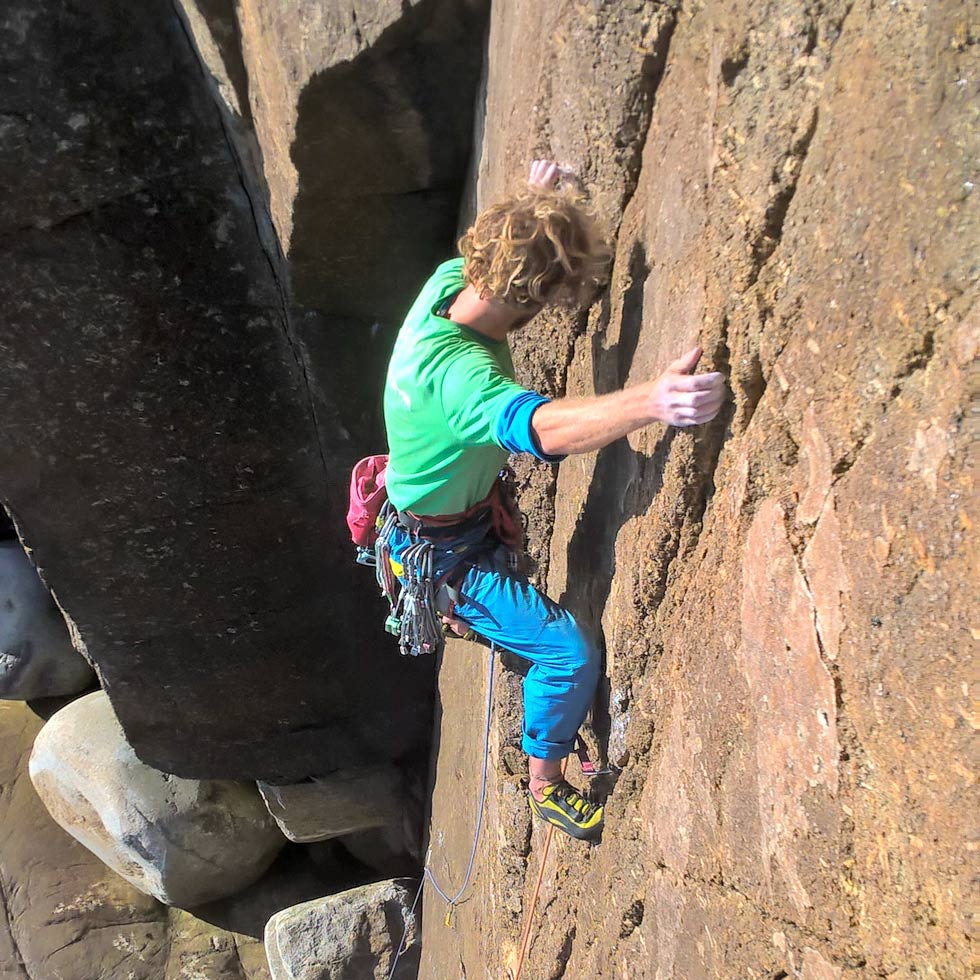
Quickdraws for Trad
Nuts aren’t much use without quickdraws. Quickdraws are your linking piece that joins your item of protection to the rope. They consist of two (usually) snap gate carabiners, joined by a short length of material. This allows the rope to run smoothly, and as the sling or dog bone between the carabiners can move, it lessens the likelihood of gear being lifted out of its placement as you push on upwards.
Finally, the ability for the quickdraw to twist, reduces the chance of a catastrophic failure caused by metal-on-metal twisting during a sudden fall.
Trad and sport climbing carabiners do vary. Whilst you could use any quickdraw for either sport or trad, generally speaking, trad optimised quickdraws tend to be designed to be as light as possible. And that’s because saving weight, where possible, is paramount for trad climbers, as we’re carrying much more equipment than just the gear needed for sport climbing.

You will need a minimum of eight quickdraws starting out. In my opinion this will only allow you to climb short routes, so choose your objectives wisely. I’d strongly recommend placing more, rather than less protection, when stating to lead your first climbs.
The more experience you have at placing gear, the better. It is also normal for your gear placements to be less than perfect when starting out. If you’ve only placed a handful of pieces, and several of them fall out as you’re climbing above them, that’s not a great situation to be in.
So, as I say, eight is a bare minimum for quickdraws. Try to add to that umber as soon as you can, going up to ten or twelve. You may want to include some quickdraws of different lengths as you increase the total number.


Slings and Carabiners
The slings you already acquired as a competent second will do you fine here. But you may want to add a couple more.
A few extra 120cm slings are amazingly useful if you are climbing a route that offers some natural threads or spikes that take a good sling placement. As well as being some of the most bomb-proof placements you can find, there’s something incredibly satisfying about using a good thread or spike placement.
Typically, every sling you own will (eventually) want its own small screwgate carabiner. This allows you to take advantage of as many uses of this combo as possible, including building anchors that may require many different pieces.

You will also want one large carabiner to use as your master point for any anchors you build. Classically, this will be a large HMS carabiner, capable of safely holding two clove hitches without compromising its function.
Hexes – Do You Need Them?
That jangling sound of metal-on-metal hexes clanging together is a less common sound at the crag these days. Generically known as hexes, owing to their shape, these oversize items of protection were essential items in the racks of early trad pioneers. But with the advent of cams, they became less and less relevant.
So do you need hexes in your rack? The next items you may want to acquire for your climbing rack may be some hexes. There are a couple of reasons you may want to invest in a set of seagull bashers.
Firstly, as a novice lead climber, they are incredibly reassuring pieces of kit to place. They are easy to place and it’s easy to judge the quality of their placement. Additionally, being so obviously big and strong, they can be real confidence-boosters for your early leads.
Secondly, the alternative to hexes are cams, which cover the same size range as hexes (plus much more). Cams are inordinately more expensive, and you can get a set of three hexes for little more than the price of one number 3 cam.


Therefore, they do serve a place in a beginner’s trad climbing rack. However, they will doubtlessly eventually be superseded by cams. Cams’ superior versatility cannot be denied, and there’s simply no point in carrying both hexes and cams in your rack. Once you’ve gotten confident at placing cams and can afford a few, it will be time to say goodbye to your hexes.
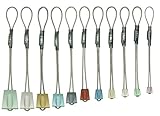
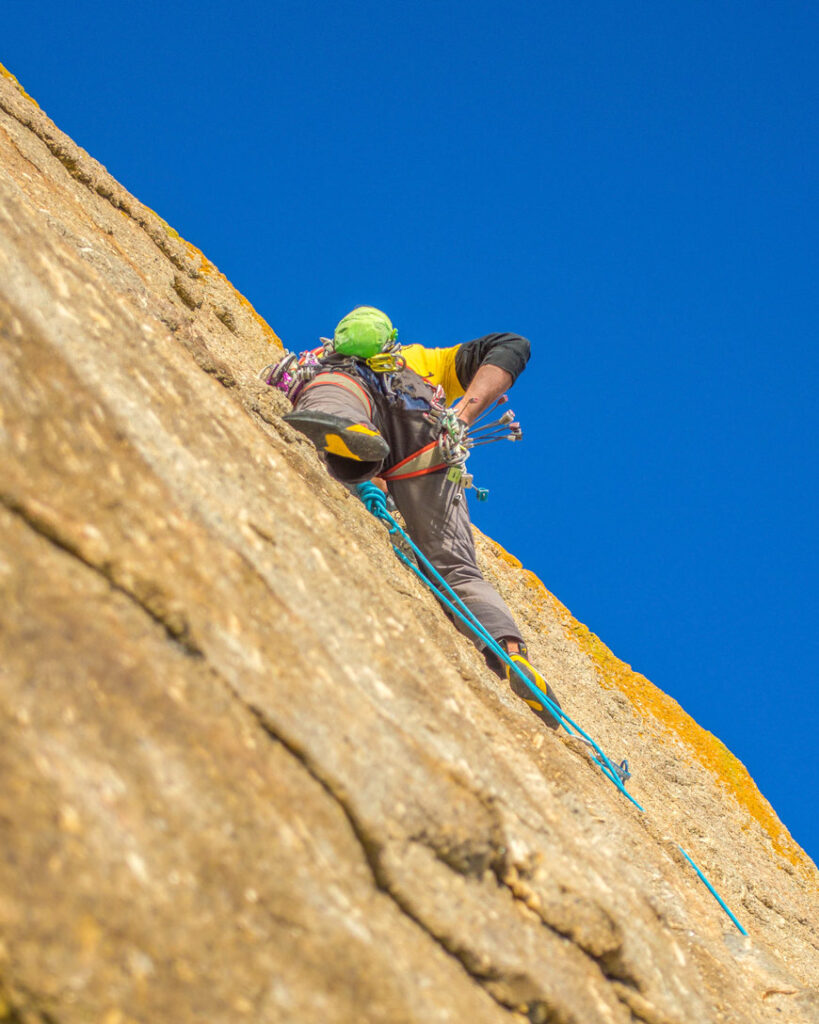
Cams
Cams are simply amazing achievements of engineering. Their deceptively simple, spring-loaded concept, means that they act as ‘active protection’ – they are continuously gripping the rock, rather than just passively sitting in a crack.
They do take a bit of experience to learn how to place effectively, and some learners do take a while to become confident with their cam placement. Once mastered, however, their versatility is unmatched, and cracks of all orientations and sizes can take a cam. This includes parallel-sided cracks that lack the constriction required for a good nut or hex placement.
When you’re starting out, the first cams you will want to get will be the ones that cover the size range where your hexes would, or used to, be. Different manufacturers use different numbering for their sizes. But as an cam pioneers, Wild Country’s cam sizing is widely understood. Therefore, I’d recommend for your first cams, go for sizes 1, 2, and 3. This will equate to sizes 3, 4, and 5 in DMM dragon cams, for example.


Preferences for cams, like anything, vary considerably. And indeed, most people who will passionately vouch for one brand of cam over another, have had spent a disproportionate amount of time using that particular device over others.
As you get the chance to climb with other climbers and use their gear, you’ll start to develop your own personal favourites.
Having used Dmm Dragon cams for a long time, I’d a huge fan. DMM seem to excel at taking an initial idea and tweaking it to make it even better. Nowhere is this more apparent than with their Dragon cams.
Their feel, the tension of their springs, and the relatively recent addition of teeth of the lobes are all just fantastic features. The built-in extender on the sling is an awesome feature too, as you can decide on the fly whether to use it or not.


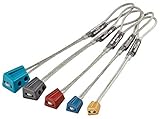
Note that, cams are generally sold without an accessory carabiner, so you will need to get one of them, ideally for every cam you use. However, some climbers do economise of both cost and weight by grouping cams together on one carabiner and then detaching them and necessarily adding them to a quickdraw when placing them on the lead.
This is an extra level of faff I don’t need when wanting to hurriedly place a cam on lead, so I have an individual carabiner for each cam. To easily be able to choose the required cam from your harness, I’d recommend pairing it up with a carabiner that matches the cam’s colour.
Extendable or Alpine Quickdraws
As you climb longer and more meandering routes, the need for careful rope management will increase. An integral part of this is the use of extendable quickdraws, where necessary (also known as Alpine draws).

I’d recommend choosing carabiners that correspond to the snap gates on your quickdraws, so that you can easily be consistent in which carabiner you clip to the rope, and which carabiner you clip to the protection.
Trad Climbing Ropes
Of course, at some point, if you’re going to be an independent climber, you need to have your own rope. This article is written on the assumption that you’re gradually building up your rack whilst still climbing on other people’s gear, and mixing and matching racks as you steadily acquire more gear.
Thus, the time at which you buy your first trad climbing rope will vary. But at a minimum, armed with a set of nuts, quickdraws, and enough gear to build a safe anchor, you could get a rope and climb carefully chosen routes with this bare minimum of equipment.
Climbing ropes is a huge topic in itself, so go here so see the accompanying article to this guide that talks just about the different types of climbing ropes.
To cover all bases, you need a single rope of 50 to 60 metres in length. It’s worth paying a little extra for a dry-treated rope that will undoubtedly last longer than an untreated rope.
You will likely move on to using two half ropes to trad climb. Here you have the choice to buy a single half rope and team up with a buddy who also has a half rope. But bear in mind, you should not climb with just a single half rope.
One way of future-proofing yourself is to get a triple-rated rope. A triple-rated rope can be used as either a single, half ,or twin rope (twin ropes are generally the reserve of ice climbers). With all things being equal, this will be the costliest option for your climbing rope. But it obviously gives you the greatest versatility and may prevent you having to buy twice, or even thrice if, for example, you were to buy a single rope and then two half ropes.

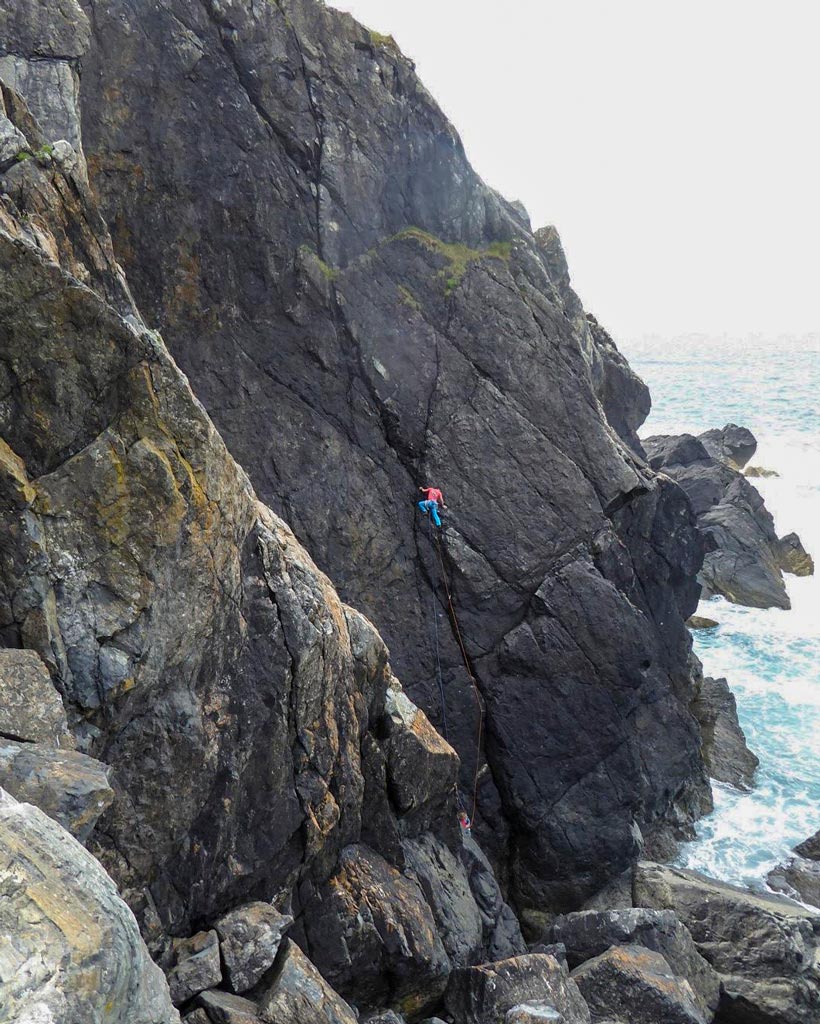
Also consider if you need to get a dedicated abseil rope. If you’re regularly climbing sea cliffs, for example, you should consider getting an abseil rope. Setting up a retrievable abseil, using your climbing ropes to abseil, and pulling them down afterwards is a good option a lot of the time. However, there as many occasions where using a bespoke abseil rope is a better choice.
For abseiling, climbers tend to prefer using semi-static (low stretch ropes). These make for a more pleasant and ultimately safer abseiling experience, as the sea-sawing effect of stretchy, dynamic ropes is reduced, lessening the chance of damage to ropes on any sharp edges.
Most (but not all) abseil ropes come in more drab colours than dynamic ropes. They conform to standard EN 1891, and ideally should be type ‘A’.
At this point, you are now a fully-equipped trad climber. With all the gear we’ve gone through thus far, you should have enough kit to independently climb a wide variety of objectives, from sea cliffs, to mountain crags up to medium grades.
But what are you going to climb?
Guidebooks – Planning Your Trad Adventures
One of the joys of climbing, apart from climbing itself, is thinking about what you are going to climb next! What classic routes are there to be climbed? What esoteric, off-the-beaten-path routes are out there that tickle your fancy? Where can you go to get lots of mileage, or hone a particular technique? And what are the routes you want to climb that will be test pieces and help push your climbing to the next level?
All of this, and much more, will be found in climbing guidebooks. At the very least, you’re going to want to have guidebooks that cover your local area, or the area you will be climbing in most often.
For your local area, a definitive guidebook such as one by the Climber’s Club should be your go to. Once you’ve climbed out the classics at your local crags, you should find stacks more to go at in your local area. Finding unknown gems in remote crags, away from the crowds, in one of the coolest things about trad climbing.
If you’re heading off on your trad climbing travels, you may want a guidebook that gives more broad coverage of a wider area. You’ve only got time to climb the classics, and don’t necessarily need to know about some slimy, unrepeated, E5 that relied on a rusty peg that no one has been able to confirm is even still in existence.
The guidebooks by Rockfax have come to dominate this latter type of guidebook. Their photo topos are hard to beat, and they only include the essential classics for any given crag.
If you’re heading to climb in Cornwall, your main guidebook choices are the definitive climber’s club guides, which are currently split into three volumes (The North Coast of West Cornwall pictured below).
As a sidenote, our climbing instructors were heavily involved in the creation of these guides, from contributing to extensive crag-checking, providing photos, and even starring in a few snaps that made the final pages, too.
If you’re just looking to do a hit-and-run on the classics, the the Rockfax Westcountry climbs will see you right. In addition, it will gove you plenty to go at from Dorest to Somerset, too.


Of course, these days, there is a vast amount of information online on crags and routes everywhere. This can include notes by people who have climbed these routes. This can give invaluable information, such as current bird-nesting activity, recent rockfall, or anything else that may affect your route that was not apparent at the time of publication of the guidebook to that area.
Getting lost in guidebooks is a splendid way to spend one’s free time. Learning about new areas, creating tick lists, as well as impressing your friends with your guidebook collection, are all fine reasons to keep buying climbing guidebooks. Indeed, which climber worth their salt doesn’t have at least a few shelves’ worth of climbing guidebooks in their house?
Specialist Trad Climbing Gear
Once you have a fairly comprehensive climbing rack, and your climbing experience increases, you may find yourself wanting to climb routes that require some more specific gear. A world of wonderful and whacky protection options is available, from the very tiny, to the very large.
There are even devices out there with intriguing names, such as tricams, Big Bros, and skyhooks. These ultra-niche devices are beyond the scope of this article. Just pray you’re never rock climbing and suddenly wish you had a few warthogs with you!
Offset Nuts
Offset nuts are fantastic! I carry a full set of offset nuts alongside my regular nuts. Designed to fit in flared, and oddly shaped cracks, where regular nuts don’t sit well, these things can occasionally really get you out of trouble. The only thing I’d caution is that they can sit so well that they can be devils to remove!
In a similar vein, Wild Country Superlites, latterly emulated by DMMs Halfnuts are also useful alternatives. I have some of these in the smaller sizes that I keep on a carabiner with my micros.

Micro Climbing Gear
It’s fair to say that as climbs increase in difficulty, it’s usually the case that the amount of available protection decreases. What protection is present is usually at the smaller end of the scale. At the very least, you may gradually want to augment your set of nuts to include some duplicates at the lower end, e.g., sizes 1-3.
However, as you enter the E-grades, you may want to include some micro wires. Micros require experience to place effectively, so only after getting a lot of mileage on the sharp end of the rope should you even consider adding these to your rack.
A well-seated placement is critical, as well as consideration as to whether the full force of a climbing fall on to such a small piece of protection could lead to rock failure.
There are various types, such as simply smaller alloy wires, as well as brass versions, often known as IMPs (standing for immaculate marginal protection). Both alloy and brass micro wires are available in offset versions as well. If I had to choose just one type of micro protection, for me it’s brass offsets.

Crack Climbing
Crack climbing is a specific sub-genre of climbing. It’s definitely an acquired taste, as generally speaking the only holds are the ones you create by stuffing parts of your body into the crack and wedging them into position so that they’ll hold.
Thus, it has a reputation as being a very painful and brutal form of climbing. And therein lies the appeal for many of those who gravitate towards ‘jamming’ as it’s known. Sadly, this reputation deters a lot of people from trying this wonderful form of climbing.
Like any new skill, the first few times we try it, we will suck. And with crack climbing, at first it will hurt. But with perseverance, once you have mastered some basic jamming skills, it doesn’t need to be painful. It does remain brutal though, that’s for sure.
Of course, cracks come in all shapes and sizes. Arguably some of the hardest size cracks to climb are the very thinnest, where only the tips of one’s fingers can get purchase in the crack. And in such a size, footwork is very tricky. Normally our technique in crack climbing is to jam the toes/feet/leg in the crack. At the thin end of the scale, that just isn’t possible, so if there aren’t good footholds on the face, you’re in for a hell of a time.
Protecting Yourself for Crack Climbing
As mentioned above, the pain and blood lost (in very real terms) crack climbing does put a lot of people off from trying the fine art of crack climbing. But with the right protection, these traumas can be reduced or eliminated altogether.

Crack Climbing Gloves
If you think making a full glove out of tape and then ripping it off your hands is a lot more trouble than it’s worth (I do!), then you should consider climbing crack gloves. I’d go further and say that, if you plan to climb crack on even an infrequent basis, get yourself some crack gloves.
They’re so convenient to use, and can be put on and taken off in seconds. The best ones I have used so far are ones by Ocun.


Protecting the Crack – Cams
In terms of protection, cams are the weapon of choice for crack climbing. Often being largely parallel-sided, nuts don’t tend to work well in cracks. And of course, the crack doesn’t have to be very large before even hexes no longer fit at all.
Depending on the shape and length of your crack, you may be able to climb using your existing rack. Shorter sections of crack will only require a few cams, and there may be other options for nut protection in the vicinity.
However, for longer cracks, you may need to double, or even triple-up for certain sizes of cam. Indeed, for very long cracks (i.e., outside the UK), it’s typical for climbers to share racks, or temporarily borrow cams for specific cracks that may require multiple cams of the same size.
Giant Cams and Off-Width Protection
When you see someone heading to the crag with a couple of cams as big as their head dangling from their bag, you know they’re in for some serious fun. They’re going off-widthing!
Off-width cracks are cracks that fit into that dreadful size where nothing fits in the crack to create a secure jam. These are generally cracks that are wider than fist-sized, but smaller than a chimney (which you could comfortably get inside).
A hideous sub-genre within a sub-genre, off-width cracks can be the stuff of nightmares. They can also be lots of fun and very satisfying battles to overcome.


Wild Country recently started producing their outrageously sized number 7 and 8 cams. They are difficult to get hold of, but can protect cracks up to more than 12 inches wide. They’re probably only going to be of interest to you if you’re a wide crack addict who spends most of their time scouring the canyons of the US desert looking for unclimbed obscenities most sane people steer well clear of.
Final Thoughts – Your Trad Journey
From your first pair of shoes, to niche protection such as giant cams, we’ve covered it – everything you need to know to get kitted-out for indoor climbing, sport climbing and trad climbing. Rome wasn’t built in a day, so build up your rack over time.
As you gain more experience, you’ll figure out what kind of climbing interests you most, and what gear you’re going to need along the way. Enjoy the journey, it’s so much fun!

By Matt – Trad Climber, Instructor & Founder of Kernow Coasteering
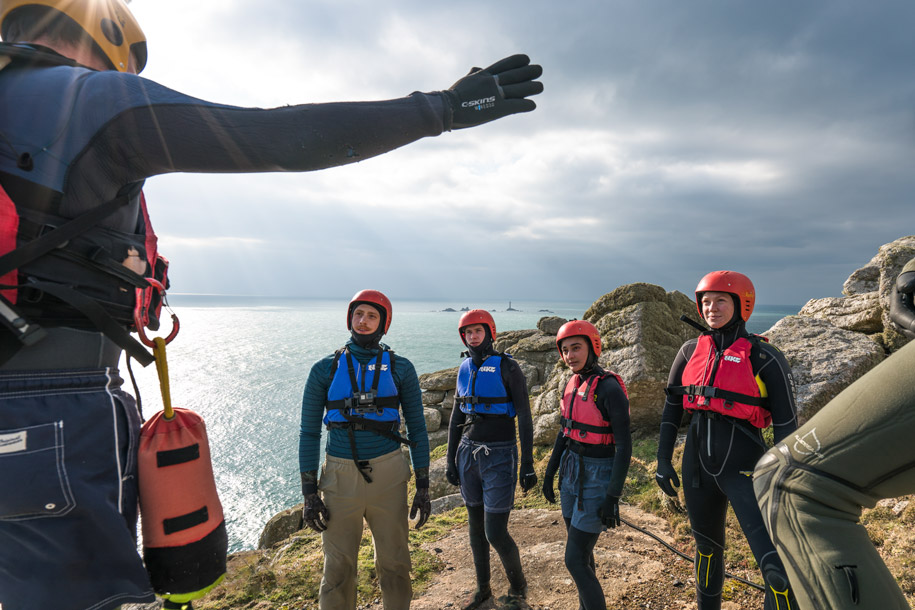
Matt George is the founder and lead instructor at Kernow Coasteering. Climbing since 2008, he cut his teeth on the sea cliffs of West Cornwall and never looked back. Almost all of his climbing is trad — a product of the adventurous local ethic and the wildly exposed terrain that defines the Cornish coast.
When he’s not leading clients or writing about gear, Matt can be found exploring obscure zawns, or dangling an outrageous number of large cams off his harness en route to another off-width battle. If you’re looking for trad climbing gear advice from someone who’s been there and placed it — he’s your guy.