In this second article in our series about rock climbing equipment, we’re looking at sport climbing. Building on the kit list we established in part one, which covered indoor climbing, we now take a look at the essential gear you’ll need for heading outside to climb bolted rock routes, including harnesses, quickdraws, and of course, climbing shoes.
Progressing to Sport Climbing
Whether you’re progressing from climbing indoors to outside, alternating between trad climbing, or brand new to climbing, sport climbing comes with its own specific set of equipment to ensure it can be enjoyed safely.
What’s the difference between sport and trad climbing?
In sport climbing, protection is already in place — you clip your rope into pre-installed bolts as you climb. In trad climbing, you place your own gear (such as cams or nuts) into cracks in the rock as you go. Trad gear adds weight, requires more judgment, and introduces additional risk. Sport climbing is designed to let you focus on movement, pushing your limits, and working routes in relative safety.
It’s worth repeating ad nauseum that you should not set out to engage in any style of climbing before you’ve had experience and training in that particular form of climbing.
There’s a big step up in the skills required to climb safely outdoors, compared to climbing in the gym. Courses with trained climbing instructors are invaluable, but so is regular mileage with experienced partners.
It is possible to find partners on various online forums, such as UKClimbing. Be honest about your level of ability, and don’t be afraid to politely ask about your prospective partner’s experience, too.
UKClimbing is especially useful as you can share each other’s logbooks. Unless someone’s logbook is a total work of fiction, it’ll give you a pretty good idea of their experience level.
But I digress…Back to the gear we need for sport climbing. I begin with some recommendations for some core equipment, common to both sport and indoor climbing.
These items were all covered in Part One of our climbing gear guides, so if you want more information about climbing shoes, chalk bags, or harnesses, start there.
This post contains affiliate links. If you use these links to buy something we may earn a commission at no extra cost to yourself. Thanks.
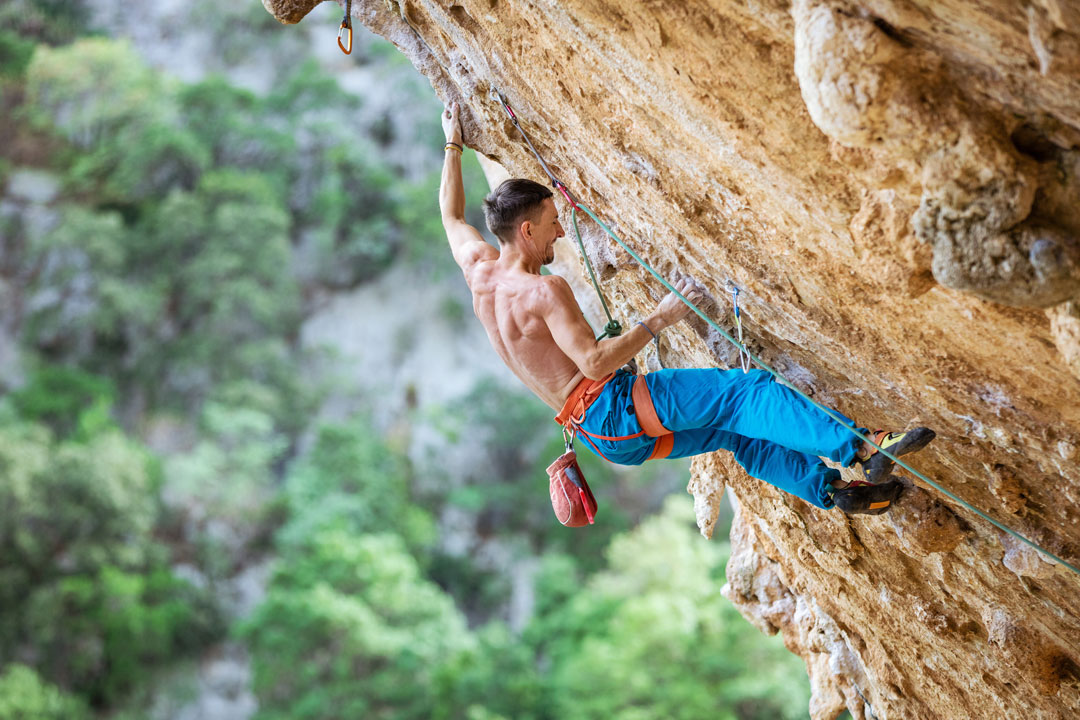
Sport Climbing Shoes
When choosing climbing shoes for sport climbing, you’re looking for a blend of precision, comfort, and performance. Unlike all-day trad routes, sport climbs tend to be shorter and steeper — so your shoes can afford to be more aggressive, with a tighter fit and downturned profile that helps you pull on small footholds. That said, how aggressive you go will depend on your goals. If you’re climbing long multi-pitch sport routes, or just want something more forgiving for mileage days, comfort may take priority.
When it comes to climbing shoes, the end is listless, as they say. Here are some of my favourite shoes I’ve used over the years.
- La Sportiva Cobra: These slipper-style shoes are without doubt the most comfortable climbing shoes I’ve ever worn. And what’s more they allow for some very technical climbing. The only downside I found, is that they are not very hard wearing, so don’t expect a long life from a pair of Cobras.
- La Sportiva Testerossa: These are the most aggressive and technical shoes I’ve ever used. They took several weeks to break in and there was no greater relief than taking them off straight after completing a pitch. But they were a fantastic performer, and I achieved some of my best climbs in these little sports cars.
- Tenaya Tarifa: My current shoe. In fact, I like them so much, I keep a rotation of three pairs. I have a comfortable all-day pair for use when guiding rock climbing courses in Cornwall, a try-hard technical version a full size smaller, and a pair in between for stuff that’s, well, in between.


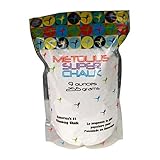
Chalk and Chalk Bag
Chalk is an essential tool for any climber and one of the few bits of gear you’ll use on every single route. It helps keep your hands dry, improves friction, and gives that little bit of extra confidence when you’re crimping on small holds.
When it comes to chalk, you’ll find a surprising amount of variation between brands. Some feel coarse, others smoother; some clump more easily, while others stay fluffy and dry. Experiment a little to find one that suits your hands and conditions. For those who sweat a lot, a higher-performance blend or liquid chalk might be worth considering.
As for chalk bags, make sure yours has a built-in waist strap — or at least plan to use a length of accessory cord to secure it. Most bags these days include a brush holder and a drawcord closure to keep chalk from spilling out in your pack. Whether you go for a minimalist design or something more padded is down to personal preference, but it’s worth getting one that sits upright when you place it on the ground.


Choosing a Sport Climbing Harness
Ensure your harness is a genuine product from a reputable climbing brand and that it bears the relevant certification i.e., EN12277 / UIAA 105. That leaves a massive choice of climbing harnesses to choose from.
Compared to a trad harness, you would expect a sport climbing harness to be optimised for comfort, and it may have larger padding, with the assumption that the wearer will be spending more time sitting in their harness as they hang-dog routes.
They may have less gear loops than a trad harness. After all, all you need are your quickdraws and, at most, a couple of slings, and few extra carabiners, and maybe a prusik.
Men’s Sport Climbing Harnesses
Most men’s harnesses are designed with a slightly longer rise and a broader waist belt to better suit male body proportions. Beyond that, it’s all about comfort and fit. For sport climbing, you’ll want something lightweight, breathable, and comfortable to hang in.
A bit of stretch in the leg loops and a well-padded waist belt can make a big difference on long sessions or redpoint projects. All of the options below are from established brands and well-suited for sport climbing.


Women’s Sport Climbing Harnesses
Women’s-specific harnesses usually feature a shorter rise and a differently shaped waistbelt to better match female body geometry. The leg loops may also be narrower or differently angled for improved comfort and fit. That said, some women still prefer a unisex model, so go with whatever feels most secure and comfortable.
As with men’s options, the key for sport climbing is a lightweight, well-padded harness that won’t pinch when hanging or belaying. The models below are all popular choices.


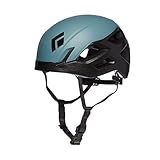
Climbing Helmet
No matter what genre of climbing you plan to enjoy outside, there are many good reasons to wear a climbing helmet. However, not all climbers do, and it remains an ongoing debate. Climbers of all levels, including top professionals, fall on both sides of the argument.
One possible stance I could take is to say, that like most decisions in climbing, the best judgement can only come from experience. With that in mind, certainly when first venturing into outdoor climbing, I’d recommend wearing a helmet at all times. The EN number for climbing and mountaineering helmets is EN 12492 (UIAA Standard 106).
Aside from adequate protection, the features that will separate helmets will be weight, ventilation, comfort, and ease of adjustment. Another feature most helmets have, are clips for holding a head torch. As most helmets do include this, it’d be a shame to spend similar money on a helmet that does not.
I currently use the Camp Storm helmet, but all of the following helmets are tried, tested, and popular models.

Women’s Climbing Helmets


Men’s Climbing Helmets

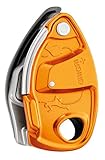
Belay Device
Belay devices broadly fall into two categories. There are traditional devices that offer no additional braking functionality. And there are those that are classified as assisted braking devices.
Remember, that in almost all cases, the manufacturer will clearly state that they offer assisted braking only, and cannot safely be used hands free.
Safe belaying is a crucial skill in climbing. If you’re unsure about your technique, consider joining a climbing course with a qualified instructor to get it dialled.
Slightly different skills are needed for assisted and un-assisted braking devices, so don’t assume you can change from one to the other without learning the nuances of your new device.
Traditional Belay Devices
A multitude of climbing gear manufacturers make traditional ‘tube’ style belay devices. I recommend you use one with some additional teeth that provide additional friction for the braking rope.
Note, that if you want to get into multi-pitch sport climbing, which will usually involve abseiling down the completed route, you’re going to want to be using a tube-style device.


Assisted Braking Devices
All assisted braking devices I’m aware of put the emphasis on ‘assisted’. They should never be used hands free and at least one hand should be on the braking rope at all times.
Don’t forget, whatever device you use, you will need to use it in conjunction with some kind of locking carabiner.


Sport Climbing Rope
As detailed in our climbing rope guide article, ropes come in a bewildering array of choices. However, if we want a rope specifically for sport climbing, we can narrow down our criteria straight away.
By default, any rope suitable for sport climbing will be perfectly fine for use indoors, or even in single-rope traditional climbing. Do bear in mind, that a long sport rope may be overkill for either of these other two climbing styles, particular on a relatively short indoor wall.
I hinted at the qualities we’re looking for in a sport climbing rope in the previous paragraph. We need a single rope (yes, that’s a type of rope), and it needs to belong enough to not only reach the chains at the top of the route, but also allow the climber to be safely lowered to the ground once the climb is complete.
Remember to ALWAYS tie a knot in the other end of the rope. Always.
A minimum length of 60-metres is advised for a sport rope. But, to cover most routes you’re likely to encounter, you may want to go for a 70-metre rope.
Unless you’re seriously pushing some hard grades, the weight of the rope isn’t going to be a serious consideration at this time. So, opt for a thicker rope, in the region of 10mm. It will be reassuringly thick, harder wearing, and therefore longer lasting than a rope of thinner diameter.
Any of the following ropes will have you covered. Make sure you select the rope length you require.


Quickdraws for Sport Climbing
Quickdraws are an essential component in any sport climbing setup. They’re the link between your rope and the pre-placed bolts on the route. A quickdraw consists of two carabiners joined by a sewn sling or dogbone.
This configuration prevents any catastrophic twisting of metal on metal that could occur if only a single carabiner was used. Additionally, it will aid rope management and prevent friction in the system building up and inhibiting the climber’s upward progress.
Quickdraws are also used in trad climbing, but sport and trad quickdraws have evolved to optimise certain qualities. Trad climbing quickdraws will usually be optimised simply to save weight, as trad climbers are carrying so much additional equipment on their harness.
Without this necessity, sport climbing quickdraws are usually thicker and sturdier than trad quickdraws, and it so follows that they are typically slightly heavier.
This allows sport quickdraws to be generally more robust, and thus better suited to the rigours of performance climbing, were falling and hang-dogging are generally much more common than in trad climbing.
Finally, whilst a common feature of most modern carabiners, look for carabiners that have a keylock nose (rather than a hooked nose). That makes unclipping them and cleaning a route a great deal easier.

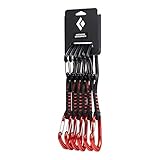
How many quickdraws do you need?
This will depend entirely on the number of bolts on a route. In fact, the best sport climbing guidebooks will even tell you how many bolts there are on a route.
To cover most eventualities you’re going to need 10 to 12 quickdraws. If your local crags are dominated by shorter routes, you may get away with less draws in your quiver. But do bear in mind that if you venture to new crags, you may be left consistently short of enough draws to climb safely.
Bear in mind, one of the easiest ways to change over for lowering at the chains is using two quickdraws, so don’t forget about that, too. I’ve been using the DMM Shadow quickdraws for a number of years now and highly recommend them.
Gear Tip: Save Money with Quickdraw Packs
Buying quickdraws individually can add up fast. If you’re building a sport rack from scratch, it’s often more economical to buy a pack of 6 or 12. Many brands offer multipacks at a lower per-draw price — and you’ll have a matching set that racks neatly and feels consistent to handle on the wall.

Slings and Carabiners
In addition to your quickdraws, you’ll need a few extra bits and pieces, namely, a 120cm sling and one or two locking carabiners to secure yourself while you re-thread the anchor. The exact setup depends on your preferred method for the changeover.
Every now and then, you’ll encounter an unusual anchor where your usual method doesn’t quite work. In those cases, it helps to not only have the knowledge, but also the right kit for an alternative approach.
If you plan to rig a sport route for top-roping, it’s best practice to run your rope through your own gear, rather than directly through the in-situ lower-off hardware. This helps reduce wear on fixed gear and is standard etiquette at most crags.
To do this properly, you may need up to four locking carabiners, plus an extra sling to build the system.

Adjustable Lanyard

t’s always a bit more of a fiddle using a regular sling, although pre-knotting a 120cm sling with an overhand knot gives you a few more options and can achieve much the same result with a bit of practice.
|
Option |
Pros |
Cons |
|---|---|---|
|
Adjustable Lanyard |
– Quick to use- Easy to fine-tune length- Tidy, purpose-built |
– More expensive- One-use item (less versatile than a sling) |
|
Knotted Sling |
– Cheap and multipurpose- Can build into other systems |
– Requires pre-knotting- Less convenient to adjust on the fly |
Sport Climbing Accessories
Armed with everything described above, you’re pretty much set. You’ve got all the essential gear to enjoy sport climbing independently and safely. That said, a few extra items can make your life a lot easier and help extend the lifespan of your kit.
Clip Stick
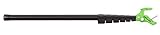
Many sport crags are developed and equipped by prodigious local climbers, often at their own expense. Therefore, it’s not uncommon to find that the first bolts on routes can be uncomfortably high on a route.
If the opening moves look sketchy, the last thing you want is to risk decking before even getting clipped in. Sport climbing is supposed to be relatively safe and there are no prizes for injuring yourself on the first move.
This ingeniously simple solution is a clip-stick. A clip-stick is an extendable pole which you can attach a quickdraw to, along with the rope, and reach up to clip the first bolt. Problem solved.
And if you’re worried about climbing ethics, don’t be. A serious redpoint attempt is considered legitimate with the first two bolts pre-clipped.
Rope Bags and Crag Bags
Dashing your rope out on the floor is fine, but over time your rope will get muddy and fine particles of grit can penetrate the sheath of your rope and potentially cause damage.
Whatever happens, there’s no denying that taking good care of your ropes will mean you can get the maximum lifespan out of them before they need replacing.
A rope bag is a very worthwhile investment. The concept is simple, they’re generally a sheet of durable material (a tarp), large enough to flake out even the longest sport rope.
This can then be rolled up into the built-in bag element, securely fastened, and either carried as a backpack, or in the hand, if preferred.


A rope bag generally refers to this simple bag that is designed to hold little more than your rope. Therefore, you’re going to need an additional bag to fit the rest of your climbing gear in. OR you can get a larger crag bag, that if chosen well, will hold all of your kit.
There are additional considerations. If you’re planning to travel abroad to sport climb, do you need a bag that can fit on the plane as hand luggage? Many manufacturers these days make bags with these things in mind.
A bag of about 45 litres capacity should just about satisfy your sport climbing needs. If you’re also a trad climber, you may want to look at some larger options. Head on over to our article on building your trad rack for more information on that.


Sport Climbing Guidebooks
Last but not least, let’s not forget about guidebooks. I’m going to assume that you’re not out developing new crags for yourself at this point.
So, you’re going to want some guidebooks to the areas in which you plan to climb. That will include guides to your local area, as well as guides for your sport climbing trips away from home.
Guidebooks are brilliant, and the standard of guides has improved dramatically in the last decade. You can now expect guides full of high-quality, colour photos, as well as exhaustively researched, up-to-date detail on the crags and routes within them.
Climbing guides are brilliant for getting psyched for climbing. Leafing through them at home and compiling tick lists is almost as much fun as climbing itself.
And once at the crag, you’ll be able to identify your objectives and get straight on with climbing, without accidentally sandbagging yourself by getting on a route three number grades harder than you had planned.
It’s of course impossible to recommend THE guidebooks you need. It entirely depends on where you plan to climb. However, the following choices should whet your appetite for some world-class sport climbing destinations in mainland Europe.


Final Thoughts
So, there you have it — that covers the sport climbing kit you’ll need. If you stick with sport and never dabble in trad, you can rest easy knowing you’ve saved yourself a huge extra expense, not to mention a few kilos of extra kit hanging from your harness.
That said, you might be missing out on the fun, adventure, and problem-solving that trad climbing offers. It’s a different challenge — and one that’s well worth exploring if it piques your interest.
Of course, trad climbing does mean buying quite a bit more gear. If you’re ready to start building your rack, head over to our full guide on building your trad rack.

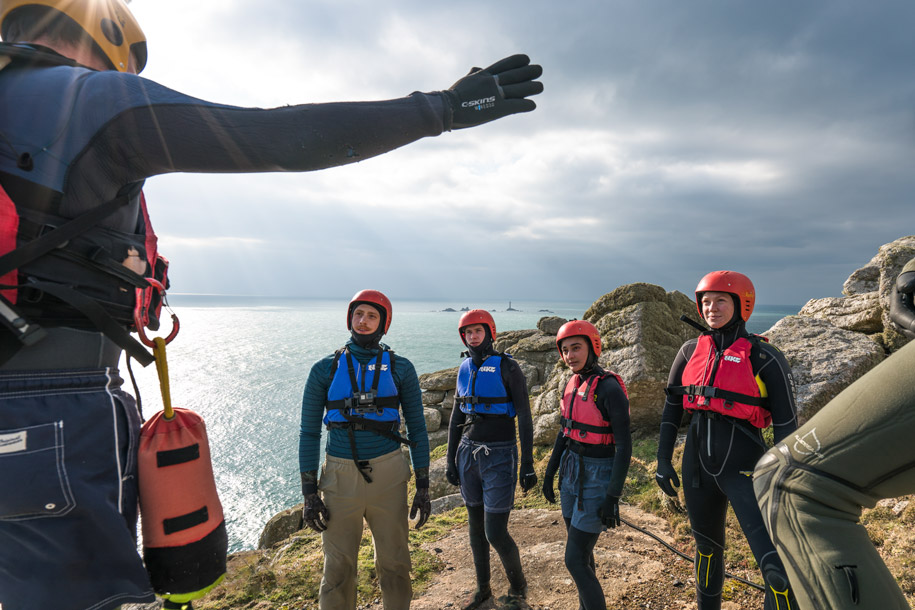
By Matt – Climber, Instructor & Founder of Kernow Coasteering
Matt George is the founder and lead instructor at Kernow Coasteering. Though his climbing roots lie in the wild sea cliffs of West Cornwall, he’s logged plenty of bolts too, from UK limestone sport routes to sun-drenched classics in Spain.
He’s helped dozens of indoor climbers take their first steps outdoors and knows exactly what gear matters when you’re building your first sport rack. Whether you’re looking for honest kit advice or inspiration for your next trip, Matt brings real-world experience and a grounded perspective.