Beginner Climbing Gear: Getting Started
Buying beginner climbing gear can be overwhelming, especially if you’re just starting out. In this blog, we aim to guide you through the process. Not only do we recommend what you need for the various types of climbing you might end up doing, we also suggest a sensible order in which to acquire your kit.
Why So Much Climbing Equipment?
There’s no denying that climbing can entail a huge amount of equipment. Different subgenres require different gear, and figuring out what to get, and when, can be a bit of a maze, especially for people new to the sport.
The good news is that you don’t need to rush out and buy every conceivable piece of climbing equipment to get started. Each type of climbing (trad, sport, bouldering, etc.) has its own fairly distinct setup. And as a beginner, you probably don’t yet know which discipline you’ll end up favouring.
That’s great news. It means you can begin with a few generic items and slowly build your gear collection as you gain experience and discover whether you prefer fiddling nuts into cracks, clipping bolts, or falling on foam pads.
This post contains affiliate links. If you use these links to buy something we may earn a commission at no extra cost to yourself. Thanks.
This guide is divided into sections. If you’re here for something specific, feel free to skip ahead using the links below. Otherwise, read on, we’ll start with the essentials.
- Getting Started and Indoor Climbing (this page)
- Sport Climbing
- Trad Climbing
- Guide to Climbing Ropes
Seeing a fully equipped climber at the crag, there’s no doubt they’ve invested a small fortune over time. But Rome wasn’t built in a day. Most climbers accumulate their kit gradually over years of climbing and you can do exactly the same.
So, let’s take a look at what order you might start with, and where you might go next. Hopefully, we’ll help you avoid costly mistakes and make the process of building your climbing rack fun and enjoyable.
Getting Started and Indoor Climbing
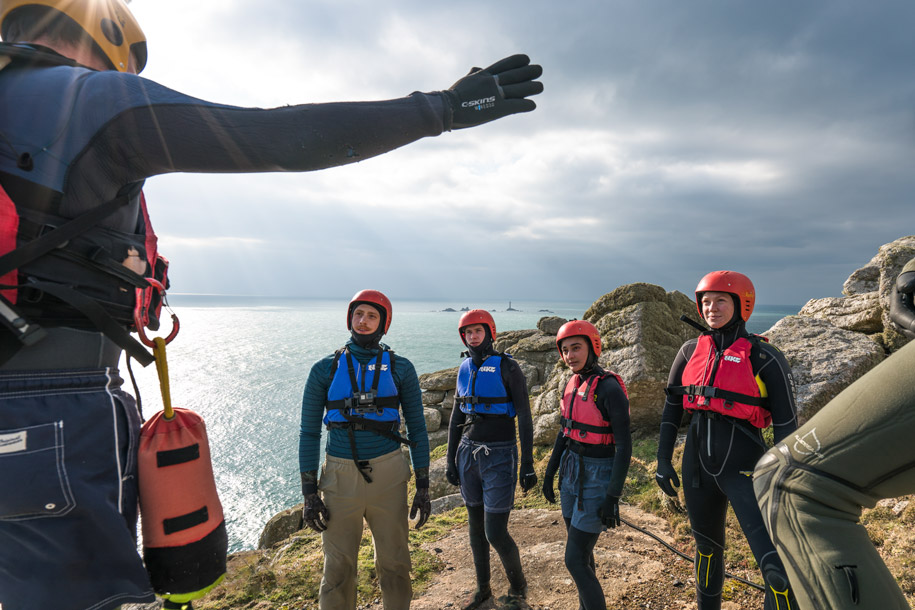
These days, most people get their first taste of climbing at an indoor wall. It’s the ideal way to try the sport and see if it’s for you. During your initial taster session, the climbing wall will almost certainly provide or rent all the kit you need. Under the supervision of a qualified climbing instructor, you can spend a couple of hours exploring the vertical world and simply decide whether you want to keep going.
So What Piece of Kit Should You Buy First?
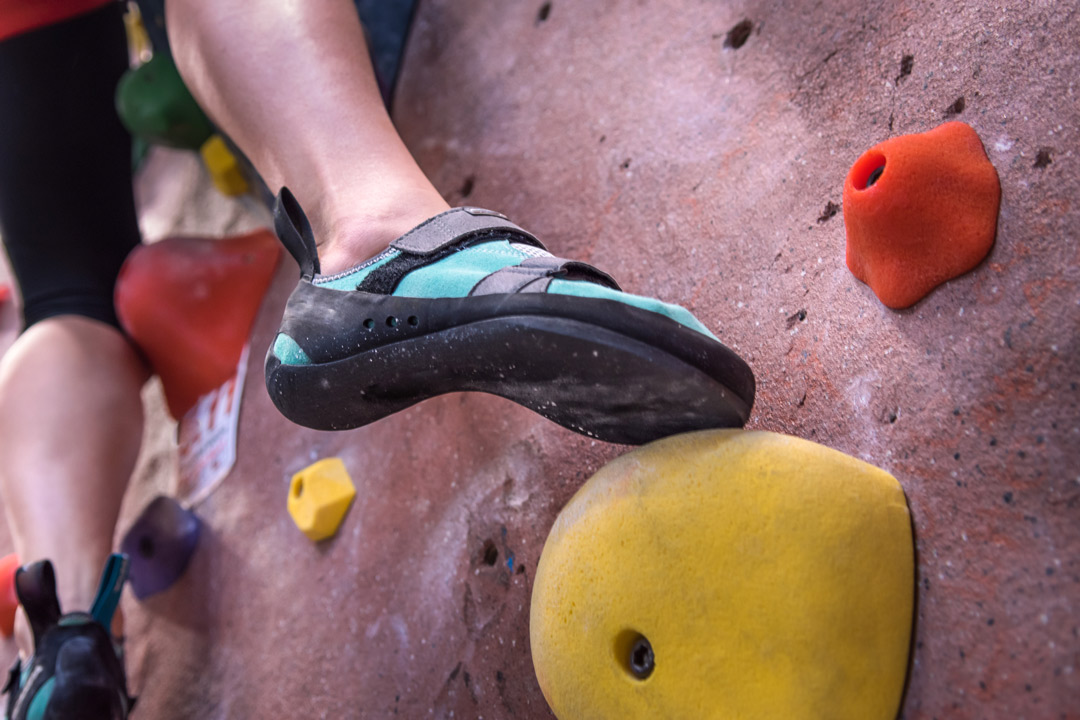
If you’re still reading, we’ll assume climbing is for you. Great news. You’ve just made a very good life decision. Whether you’ll be going to indoor climbing walls or want to get straight into outdoor tuition, there’s one bit of kit you’ll need from the outset: a pair of climbing shoes.
Climbing shoes are the one piece of gear that applies across all forms of climbing, from indoor bouldering to outdoor trad routes. More importantly for beginners, they are the only item you truly need to start climbing independently. With just a pair of shoes, and perhaps a chalk bag, you can enjoy endless hours of indoor bouldering. This is the gateway into climbing for most people entering the sport today. No ropes, no belaying, and no expensive kit. Just you, the holds, and the wall. That’s why, if you are only going to buy one thing at first, it should be climbing shoes.
While some people can climb 7a in trainers, it’s safe to say that no one who takes climbing seriously does so without climbing shoes. Climbing walls will absolutely insist on it, not least because muddy street shoes wreck their holds.
If you’ve never looked into the world of climbing shoes, you may be surprised at just how overwhelming the options are. Brands offer every colour, shape, and fastening system imaginable. Some shoes are flat-soled. Others are aggressively downturned or asymmetrical. They might be lace-up or Velcro. So where do you start?
Beginner Climbing Shoes: Comfort is King
For your first climbing shoes, one quality above all others is paramount: comfort. Until you’ve learned good foot technique and toughened up your toes, there’s no point in suffering. Downturned or asymmetrical shoes are optimised for steep ground. Your footwork and finger strength aren’t there yet.
Because feet vary so much, it’s worth trying shoes on before buying. If that’s not possible, choose an online retailer with a generous returns policy in case the fit is wrong.
Living and climbing in west Cornwall, I don’t have any climbing gear shops nearby. I’ve almost always bought shoes online after doing my research.
A Few Personal Favourites
Recommending climbing shoes is tough because of how much fit varies between individuals. As a general rule, I’d suggest sticking to better-known climbing brands. That goes for everything in this guide, but it becomes especially important when we start talking about life-critical gear.
Here are a couple of classic models worth considering. They are comfortable, widely available, and popular with beginners.


By far the most comfortable climbing shoe I’ve ever worn is the La Sportiva Cobra. Technically a slipper with no laces or Velcro. They’re soft and surprisingly capable. They do wear out quickly though, especially if you’re new and your footwork is a bit scrappy.


Not strictly a beginner shoe, but I’ve settled on the Tenaya Tarifa as my go-to. I now own three pairs, all half a size apart. One for comfort, one for trying hard, and one in between.
The shape isn’t too aggressive, so with a slightly larger fit, they could be a great choice early in your climbing career
Chalk: The Magic Dust of Climbing
Once you’ve got your first pair of climbing shoes, there’s one other piece of kit that’s worth buying early: chalk and a chalk bag.
Climbing chalk improves grip by drying the sweat on your hands, which can make a surprising difference to your confidence and performance. Most beginners borrow a chalk bag when needed, but getting your own is cheap, convenient, and a small but satisfying step toward personalising your gear setup.
Chalk may look the same across brands, but it isn’t. Different manufacturers use different blends, and the texture, dryness, and consistency can vary a lot. Some climbers prefer fine powder, while others like a chunkier feel. Some chalk feels smoother, drier, or more effective than others. Finding the one that works best for you often comes down to trial and error.

Chalk is stored in a chalk bag, a small pouch you clip around your waist or attach to your harness. Most are fleece-lined to help distribute chalk evenly on your hands, and they come in a variety of styles and sizes. Some have stiff rims for easy access, others include zip pockets or brush holders. For indoor use, any basic model will do, just make sure it fits your hand size and closes securely to avoid spills.


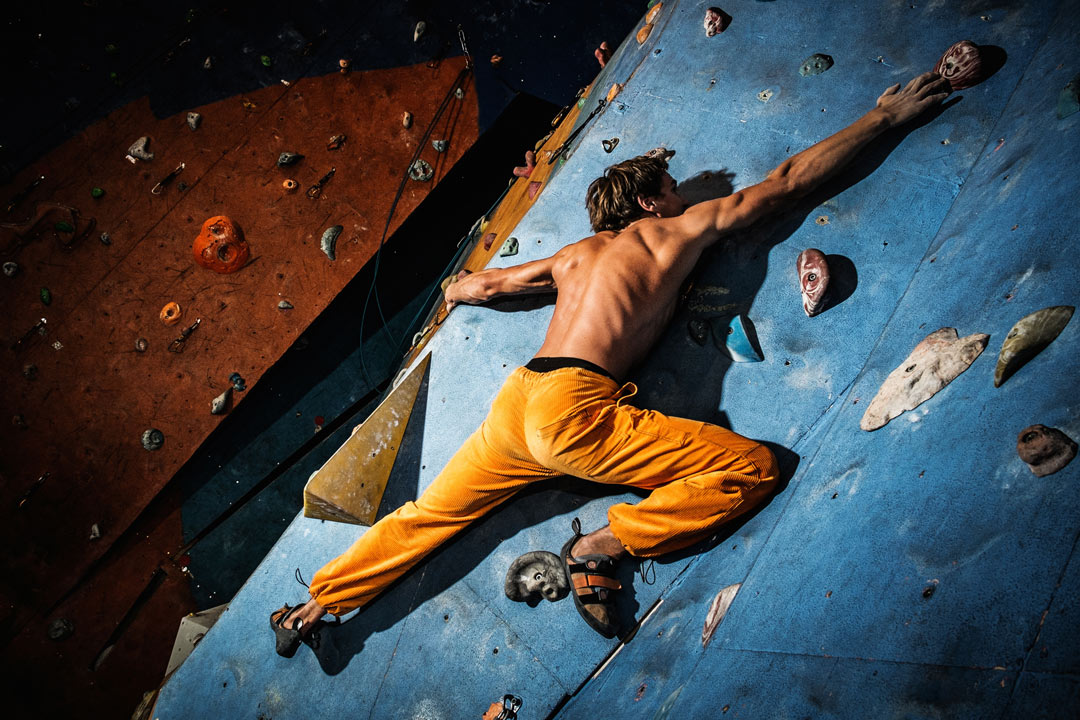
With a pair of climbing shoes and your own chalk bag, you’ve already got everything you need to enjoy indoor bouldering. You can also join outdoor bouldering sessions, as long as someone brings a crash pad and knows how to spot properly.
If you’re keen to move into roped climbing next, you’ll need to borrow or rent a few extra bits of gear. But don’t underestimate how far you can go with just shoes and chalk. Bouldering is a brilliant way to build strength, coordination, and confidence, and it’s where many climbers first discover their love for the sport.
Climbing Harness, Belay Device and Carabiner: Essential Beginner Climbing Gear
With three more essential items, your climbing horizons expand dramatically. You now have access to the world of roped climbing. What starts as top-roping in your local gym could one day lead you to big walls in Yosemite.
To move beyond bouldering, and enjoy roped climbing in its simplest form, you’ll need:
- A climbing harness
- A belay device
- A locking carabiner
These work together to keep you safe when climbing with a rope, whether you’re being belayed from above or leading the way up.
Should You Buy Second Hand Climbing Gear?
I strongly advise against buying second-hand climbing equipment. You have no way of knowing its full history, and any damage, especially to safety-critical items, may not be visible.
For gear where failure could lead to serious injury or worse, such as harnesses, ropes, carabiners, belay devices, and soft goods like slings, the risk simply isn’t worth it.
Choosing Your First Climbing Harness
Unless you’re bouldering, climbing usually means being tied into a rope. And without a climbing harness, that rope won’t do much to keep you safe.
A harness is your personal connection to the rope system. In the event of a fall, it spreads the force across your body and helps the belayer catch you safely. It’s one of the first pieces of life-critical climbing equipment you’ll buy.
A Brief History of Climbing Harnesses
Long gone are the days when pioneering rock climbers would simply tie the rope around their waist, essentially solo the route, before pulling their partner up the route in a questionable body-belay. Some surprisingly hard routes were put up in this style before the forerunners of modern climbing equipment started to appear on the scene, including the modern sit harness.
Climbing Harness Safety Standards
Today, every reputable rock climbing harness must pass rigorous safety tests. If you’re in the UK or EU, look for the EN 12277 certification on the label. This confirms the harness has met the European safety standard for climbing. In the US and some other regions, the UIAA 105 certification serves a similar purpose.
It’s also important to buy the right type. There are many harnesses designed for other purposes, such as caving, industrial work, tree surgery — but for climbing, you need a sit harness designed specifically for the sport.
How to Choose the Right Beginner Harness
Even among climbing-specific harnesses, the variety is enormous. Most major manufacturers offer several models with different features.
Key factors to consider:
- Padding and comfort: Heavily padded harnesses are ideal for longer days or hanging belays.
- Weight: Sport climbing harnesses tend to be lighter with fewer gear loops.
- Gear loops: Trad climbers often want more loops for racking nuts and cams.
At this stage, you may not yet know what style of climbing you’ll focus on. That’s OK. A well-rounded beginner harness will serve you well across disciplines.
Recommended Beginner Harnesses
I’m a huge fan of the DMM Renegade harness. It’s designed with trad climbing in mind, but it’s also light and versatile enough for indoor and sport climbing. I’ve used mine in all settings, including long days at the wall, without discomfort.


If you’re looking for something more affordable, the CAMP Energy harness is another solid choice. CAMP have built a reputation for producing reliable gear at budget-friendly prices. This harness is ideal for indoor and sport climbing, and will likely remain useful even as you progress.
For more info and harness options, check out this guide to sport climbing equipment.
Belay Devices for Beginners: Assisted or Not?
If you want to move beyond bouldering, belaying is one of the first skills you’ll need to learn. This simple but essential task involves managing the rope for your climbing partner. Once you’ve mastered it, most climbing gyms will let you use their pre-rigged top rope systems after a quick demonstration of your competence.
Assisted Braking Belay Device or Not?
Belay devices fall into two main categories. Some are traditional tube-style devices that rely entirely on the belayer to manage friction and stop a fall. Others offer an assisted braking mechanism, which provides additional stopping power if the belayer loses control of the rope.
Manufacturers are usually careful to stress that assisted braking does not mean automatic. You must never let go of the brake rope, regardless of which device you’re using.
In theory, assisted braking devices are safer. However, they can be misused. Some climbers forget that they still need to maintain proper hand position, and bad habits can develop. These habits may carry over when switching to a simpler device that doesn’t offer the same margin for error.
Tube-style devices, when taught correctly, encourage solid rope-handling skills from the beginning. While there is more room for user error, proper tuition and supervision reduce that risk. Many instructors still recommend learning with a basic device before progressing to assisted models.
If you want to build good belay habits from the start, consider contacting a professional climbing instructor who can walk you through the pros and cons of different devices and help you use them safely.
At the time of writing, there is no industry-wide consensus about which device is best for beginners. Some climbing gyms will have strong preferences and may even ban certain types. Always check their rules before turning up with your own kit.
Coming from a trad background, I believe there’s still value in learning with a tube-style device. They teach you to be attentive and to handle ropes correctly. If you go that route, make sure to choose a model with braking grooves, such as the Black Diamond ATC-XP or the DMM Mantis. The braking rope should always be oriented into the grooves for maximum friction.


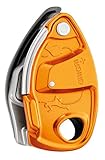
The Assisted Braking Device of Choice
For assisted braking, new models appear frequently. Despite this, the most popular option remains the Petzl Grigri. I rate it highly, even though I’m mostly a trad climber. One good thing about the Grigri is its ubiquity, as its operation is widely understood and accepted by climbers and instructors the world over.
Choosing a Suitable Carabiner for Your Belay Device
Why are there so many different types of carabiners? Because each one is designed for a specific job. Because each one is designed for a specific job. We’ll explore this in more detail in our trad climbing gear guide, but for now, let’s focus on what you need for belaying.
First, make sure the carabiner you’re using is certified for climbing. Look for the EN 12275 and UIAA 121 markings. These confirm it has passed the relevant safety standards.
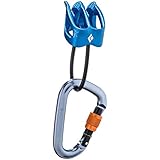
The carabiner that connects your belay device to your harness should usually be medium to large in size. A bigger carabiner gives you enough room between the tie-in loop and the device itself, reducing the chance of interference or jamming during use. It also provides space to tie off the device if needed.
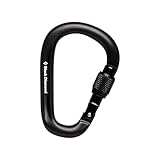
There are several locking systems to choose from. The most basic is the screwgate, which is widely used and perfectly suitable for most situations. If you want extra peace of mind, consider a twist-lock carabiner or one with a secondary locking clip that prevents the carabiner from being cross-loaded. Cross-loading occurs when the carabiner is loaded sideways, which dramatically reduces its strength.
Two excellent examples are the DMM Rhino, available in both screwgate and locksafe versions. Other good options include the Wild Country Ascent Lite and the Black Diamond Pearlock Screwgate.


Many manufacturers also sell their belay devices in a bundle with a suitable carabiner. This is a reliable way to get a good match between the two and can sometimes save you a bit of money.

Ready to Lead Climb Indoors? Here’s What Else You Need
What, we’re lead climbing already? Well, yes. After your first taster sessions, you picked up climbing shoes and chalk, then got properly hooked on indoor bouldering. A few weeks or months later, you learned how to belay and bought the gear needed to climb with a partner, taking turns on either end of the rope.
The next natural step is learning to lead climb indoors. This comes with extra responsibility and risk, so be sure to get the right instruction before you begin. Most climbing walls offer lead climbing courses or can recommend instructors. Or you can take things further with one of our lead and multi-pitch climbing courses.
The good news? You only need one extra piece of gear to start lead climbing indoors: a rope.
That’s it.
Of course, there’s a lot to know about ropes, which is why we’ve written an entire climbing rope buying guide to walk you through your options. But for now, here’s the essential takeaway: for indoor lead climbing, you need a single dynamic rope. These are specifically designed to absorb the force of a fall.
Check with your local wall to confirm their minimum rope length for leading. In most cases, a 50-metre rope will be long enough for the majority of indoor routes.
Recommended Indoor Lead Rope:
- DMM Statement – Dynamic Climbing Rope (50 m)
With this final piece of gear, you’re now equipped to enjoy every major style of indoor climbing.


What Comes Next in Your Climbing Journey?
From here, many climbers begin venturing outdoors. Your next steps might involve sport climbing, traditional (trad) climbing, or both. Each discipline has its own demands and rewards, and each will add new layers to your gear collection, knowledge, and climbing experience.
Wherever you’re headed next, we’ve got in-depth guides to help you get fully prepared — starting with our sport climbing gear guide.
Keep climbing, stay safe, and enjoy the journey.